As promised, here is a full write-up on how to retrofit projectors on the Volvo V70 reflectors. It will cover everything you would need to know starting with removing the headlights from the car and ending with the final product. When reading this, it seems like a million steps but I literally took a picture of every single step and made the assumption the reader has no level of expertise. Feel free to ask any questions I may not have addressed. I hope for this to be my greatest contribution to the forum. I was pretty well know on Volvoforums for doing an LED dash conversion write-up for the 850. I tend to be extremely detailed.
– Mini D2S 3.0 projectors — NOTICE here the 2.0 projectors are used, the 3.0 should fit as well!
– Gatling Gun shrouds
– Aharon Speedstart D2S Canbus ballasts
– XB35 5500K D2S bulbs for the best light output
– Position lights 5000K to match the xenon lights
Tools Required
-10mm socket wrench (bumper screws)
-8mm socket wrench (headlight screws)
-6mm socket wrench with extension (leveling motor adjustment)
-Needle nose pliers
-Philips head screw drivers (different sizes)
-T10 torx head screw driver
-T25 torx head screw driver
-Heat gun (optional but recommended)
-Spring loaded clamps (optional but recommended)
-Other misc. tools that you should have somewhere
Step 1: Headlight removal
First, we need to get that front bumper removed. Start with the 6 pins at the top just under the hood. To remove them, push in the center with anything small and rigid then pull out using a flat head screw driver.

Next, loosen the T25 torx head screw in the front wheel well. The picture is taken looking forward on the car. Loosen this screw 5-10 turns then use the screw driver to push the screw in. Pushing this screw in releases a lock which pulls the bumper onto the car when re-installing.

Starting with the circled area, use a small flat head to pry off the trim piece. Be careful not to damage your paint. Once you get it started, put down the flat head and continue to pull off.

The two arrows below show where two 10mm bolts will be hidden. Remove with socket wrench and pull out CAREFULLY. Make sure the bolt stays in the socket when pulling out because if it falls in the bumper it is a PITA to get out from the internal cavities of the bumper.
Now, pull outwards on the circled area below while also pulling the bumper forward, off from the vehicle. If you pushed in the locking segment far enough when tackling the T25 screw this should be easy. If it doesn’t want to release, loosen the T25 screw a few more turns and push it in a second time. Once both sides are released, pull the bumper off from the front of the vehicle.

The next two pictures show where the 8mm screws are located to release the headlight assembly. I show three screws but there may be a fourth underneath the headlight. I may have removed mine and chosen not to replace because it may be hard to access. Hopefully someone can chime in and clarify this step.


Lastly, pull out the headlight slightly and remove the following three connectors to release the assembly. The assembly is now removed from the car.

Step 2: Teardown of the headlight
First, remove the 4-5 clips (can’t remember how many) that surround the perimeter of the lens. A flat head or needle nose will work fine here.

This is the step where a heat gun is optional. You can also set your oven at 225F and bake for 5 minutes to loosen the headlight tack. I recommend a heat gun because the bezel paint can bubble if it exceeds a certain heat. With the heat gun, you choose what areas get heated and which do not. If using a heat gun, heat around the entire perimeter shown in red. After the perimeter is HOT, begin to pry from the arrowed direction. I use a flathead to get it started then an old sock (because it’s HOT) to pull once I can get a grip.

As you are pulling the lens off, it is critical to make sure none of the tack touches the bezel. Tack can only be removed from the bezel by heating it and this can cause bubbling of the bezel paint so try to avoid by all means. As you are pulling the lens off, it will look like the picture below. The “strands” of tack can easily be dealt with by hitting them with the heat gun. The heat will make the strands snap and curl up much like spider legs when you hit them with a blow torch. F*** spiders.

As soon as the lens is removed, the bezel needs to be removed. Once again I use the heat gun to loosen the tack at the arrowed directions below. The bottom of the bezel has three locations which need to be heated and the top has two. Make sure to not hold the heat on the bezel for too long to avoid paint bubbling.

Now that the tedious processes are done, we just need to take apart some inside components. Remove the cap behind the headlight assembly to gain access to the HID bulb. Start by removing the metal clip completely (looks like a bent up paper clip). Then twist and pull out the HID bulb. Be sure to pull straight out because the bulb is made from a very thin glass that will easily shatter if it contacts anything while being removed.

Disconnect the connector and place the HID bulb and socket aside.

Remove the four arrowed screws with a small Phillips head screw driver. These screws hold in that HID bulb’s housing thingy. Pull out the thingy.

Here is a picture of the thingy and the HID end cap. It’s a good idea to hold all the screws in the end cap so you cannot lose them.

The following circled screws are T10 size. They hold the reflector in place on the dynamic bracket. I call it a dynamic bracket because it moves when the high beams are activated.

As soon as the three T10 screws are removed, the reflector should simply fall out.

The next step requires locating the three circled pins. They have a center piece which needs to be pulled out with needle nose pliers. Just give em a yank.


Even after the pins are taken out, the dynamic bracket will not release. The housing the pins were in needs to be squeezed with the needle nose to allow them to fall through and release the bracket.

After pushing all three through, the bracket will come out. This is what I am calling the “dynamic bracket” for future reference.

To remove the pins completely from the headlight, they once again need to be pinched and pushed through. We will not be using these again because we do not need to dynamic bracket to move back and forth to actuate the high beams. The projectors have high beam capability but it is internal to the projector.


The next piece to remove is what I call the “geared wheel”. After the dynamic bracket is off, this just pulls out. This will also not be reinstalled.


Now all we have left is a nice circular cavity to install the projector lens.

For those interested in the operation, this circular cavity is the back-bone of the old reflector assembly. It has the ability to rotate to adjust headlight level but besides that you can think of it as “fixed”. Remember that geared wheel which was sandwiched between this back-bone and dynamic bracket? When high beams are activated, that geared wheel rotates. Because of its design, it acts a lot like a cam and forces the dynamic bracket away from the back-bone when spun. When the high beams are released, the wheel spins back to its original position and the dynamic bracket is pulled back towards the back-bone by those pins that had the springs around them. Looking at a cross-section from the side, it’ basically three layers with the geared wheel determining the distance between the outer two layers. Hope this helps people understand how the headlight works and why we no longer need the geared wheel and dynamic bracket.
If you choose to cut out the reflector and use it around your projector shroud (some people like this look better) then you may want to keep all your components so the reflector will have something to screw into (the dynamic bracket). You could also attach the cut out reflector to your projector shroud using a glue and not have to worry about the geared wheel and dynamic bracket. This is just an optional step you may choose to attempt if you want to keep the reflector look.
Step 3: Preparing headlight
I did many tests to try and avoid pretty error lights in the dash. There is a position switch behind the reflector you just removed that lets the car know when high beams were successfully de-activated. If you do nothing with this switch will remain open and the car will think the reflector did not return to the home position and that the high beams are stuck in the “on” position. This causes the error code below. To avoid this error, I used a little piece of popsicle stick and some epoxy (any adhesive can be used) to keep the switch depressed. I tested multiple times and this is the most effective way to eliminate errors. I did not try to disconnect the switch but assumed that would not work.


After that mess was figured out, I taped off all of the areas surrounding the aluminum bracket and hit it with some plastidip black paint. This step is not necessary but I did not want that aluminum bracket visible as it gives the headlight an “unfinished” look. This step is completely up to you as to how you want to approach it and what your tastes are.

The next thing that needed to be prepared was the shrouds. I was disappointed with the low quality shrouds I got. The chrome look was very grainy and unfinished looking but my biggest complaint was with the angel eye slits. If you are not doing an angel eye this should not affect you. I had to use a nail file to open up all of the slits around the gatling gun shroud because the manufacturing was piss-poor. I ended up choosing to sand the shrouds altogether and go with body matched color. Once again, this step is all personal preference and may be omitted. Even after opening up the slits, I chose to mount the angel eyes in front of the shroud instead of behind (explained later).


The shrouds will need to be dremeled a little bit so there is no interference with the headlight body. The picture below shows this interference. Just keep cutting and refitting until all interference is gone. If you choose to leave the interference you will notice adjusting the level from outside the headlight using the 6mm nut in back is more difficult.

For those interested in angel eyes, read the following. For those who are not, move on because this will be boring. I ultimately made the choice to go with the CCFLs and not the LEDs. The reason I chose this is because I am a much much bigger fan of the cool white look. Also, I can see the individual LEDs on the other angel eyes although most claim they cannot. The CCFLs have a much more uniform light and to me look more professional.
I also made the decision to mount in front of the shroud as opposed to behind. When they are behind the shroud, they don’t look nearly as stunning. The picture is misleading because the CCFL behind the shroud looks nice and bright. In reality, it is extremely hard to see the CCFL behind the shroud. I am also installing CCFLs around the DRL but you will have to see the final product for that. As for sizing information, behind the shroud takes 100mm, in front of the shroud takes 80mm, and the DRL location takes 80mm. Oh ya, and I painted my shrouds to match the Ti-Grey. U jelly?


Step 4: Fitting and adjusting the Projectors
And now the meat and potatoes, fitting the projector lens. The picture here shows the order to install each piece. First start by loading the xenon projector (with nothing on the threaded ring other than the large rubber washer) into the cavity of the headlight.


Once in, load the metal washer onto the threads followed one of the two small rubber washers. It is very important to add a shim behind the metal ring. Initially I did not do this and found out that I could not adjust the headlights high enough using only the 6mm level adjustment nut in back of the headlight. I would reach the adjustors limit before getting them as high as I wanted. This shim (penny cut in half and epoxied in place) gives the projector enough of an angle so it is in a comfortable adjustment range using the 6mm nut. DO NOT SKIP THIS STEP.


Here is a picture of what could happen if you do not install a shim. The left headlight has no shim and the leveling motor is set to its max height. The right headlight has the penny shim and is also set to the max height. Amazing how much the penny changes the angle.

Next, screw on the open-ended nut and tighten. The best way to tighten is to push the projector in the direction shown to compress the large rubber washer to make the nut easier to tighten. I got this nut as tight as possible with my bare hand then hit it a little more with needle nose plyers. Get it tight but not tight enough to where it could crack the plastic.


Lastly, you need to prepare the xenon bulb. Load the metal ring and second small rubber washer onto the bulb as shown and finally place the end cap onto the bulb. There is only one way the bulb can be installed into the projector. Simply rotate the bulb until it falls into the keyed slot. This also keeps the bulb from spinning when tightening the end cap. If the bulb still wiggles when the bulb’s retaining nut is tight, you will need to remove it and tighten the nut behind it more.


Now that the bulb is in, you will want to make sure the bulbs are level horizontally before replacing the lens. To do this, install the headlight back into the car without a lens (screw it in too don’t just hook it up). Fire up the headlights (this is a good time to check for errors as well). Make sure the car is on a level surface and pointed at a preferably white wall (like a garage). Now you have two options. Whip out the measuring tape and take measurements or just eyeball the angles to your satisfaction. I am a simple person so I just eyeballed it. You can rotate the projectors to make fine adjustments to the horizontal level. Do not worry too much about the vertical level because that can be manually adjusted later from outside the headlight. Just make sure the vertical levels go high enough for your satisfaction. If not, more penny shims will help. After I got them where I wanted I actually put a dab of epoxy on the metal washer in back to keep them from rotating. This step is optional but I wanted to take a safety precaution so vibrations wouldn’t change their angle. Otherwise, make sure the nut on back is tight enough so only a strong rotational force can turn the lens. Keep in mind that vertical adjustment can be done even after the project is over but horizontal level will be trickier so get the angles right now.
After the angles are adjusted, it is time for the shrouds to be installed. Use the centric rings (black) to press fit the shrouds onto the projector lens. Make sure that the cavitites you cut with the dremel to eliminate interference are located properly.


Step 5: Putting everything back together
If you choose to install the CCFLs, it is easiest to just use little dabs of clear epoxy to adhere to both the shroud and the open cavity for the DRL. A little epoxy goes a long way so small dabs are just fine.


I chose to run the CCFL wires out of the headlight by drilling into the bottom and mounted the ballasts outside. Some people have entertained the idea of mounting the ballasts inside (ehem DevolvR) but I have read nightmare stories about ballasts going out in cold weather and wanted mine easily accessible for replacement if need be. I would hate to open up the headlights everytime a ballast fails.

Now you are finally ready to reseal. FOR GODS SAKE DON’T FORGET TO PUT THE BEZELS BACK IN BEFORE SEALING. From the Caps lock you can probably assume I have done so myself. It sounds stupid but is easy to miss. Make sure there are no areas around the perimeter of the lens that is noticeably missing tack. If there is, donate tack from a more generous area to that are which is lacking. Heat up both the lens and the headlight’s perimeter to get it nice and tacky so it presses on easier. Also important, be very careful when lowering the lens because it is easy to be careless and scrape the bezel with the tack on the lens which will pretty much ruin your day. Once on press firmly with your hands to seal up as good as possible.
After “hand sealing” to ensure proper seal it is highly recommended you go this extra step. Buy at least 4 small spring clamps from the hardware store and apply them to a section of the perimeter. Don’t need to do the whole lens at once. I did about ¼ of the perimeter at a time. Once clamped heat up nice and hot with the heat gun, you will actually see the lens sink further. After sunk, let the area cool and then move your clamps and do the next section. I think most people who have leaks afterwords skip this step.

Don’t forget to replace the little metal clips that keep the headlights held together which you removed earlier in the project. Replace the black trim that goes on the topside of the headlight and you are ready for reinstallation. Should be plug and play except for the CCFLs. I believe mine are spliced into a green wire and a white wire at the parking light/blinker connector. This is effectively tapping them into the parking light for that always on look that I wanted. They also go on with the approach light button (yellow button) on your remote which is cool in a parking lot when approaching your car.
Reinstalling the bumper is the opposite of removal (always wanted to say that).
Step 6: High beam wiring
We all owe forum member Wrath a big thank you for this one. I wasn’t thinking when I did my write up and completely omitted how I wired in the high beam functionality of the projectors.
When looking at the headlight from the front, locate the main connector. Splice into the two right-most wires. The top is positive and the bottom is ground. You projectors should have a black and red wire hanging from it. This is for the little flappy door electromagnet which activates high beams. Also note it is much easier to splice in INSIDE the headlight instead of the outside part of the connector because that is one less wire to run through the headlight housing. Everything stays internal.
Driver’s side

Passenger’s side

Simple wiring diagram

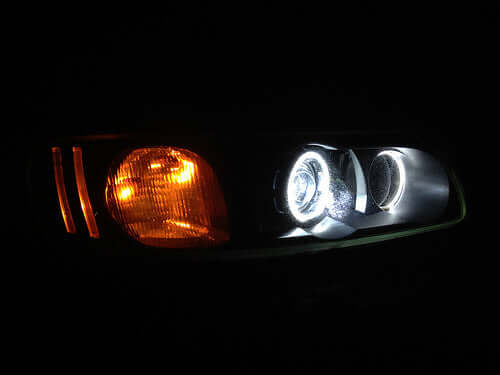
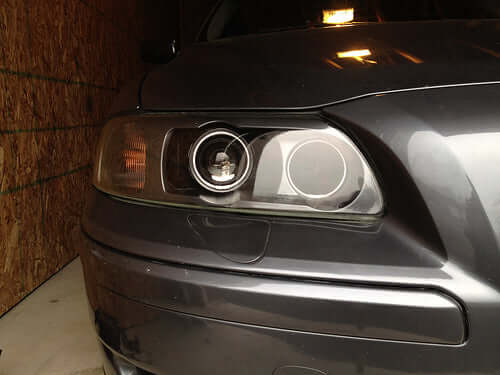
Step 7: Enjoy your work


Source: Saleen9090 on swedespeed
– Mini D2S 2.0 projectors — NOTICE here’s used the 2.0 projectors, the 3.0 should fit as well!
– Gatlin Gun shrouds
– Aharon Speedstart D2S Canbus ballasts
– XB35 5500K D2S bulbs for the best light output
– Position lights 5000K to match the xenon lights


