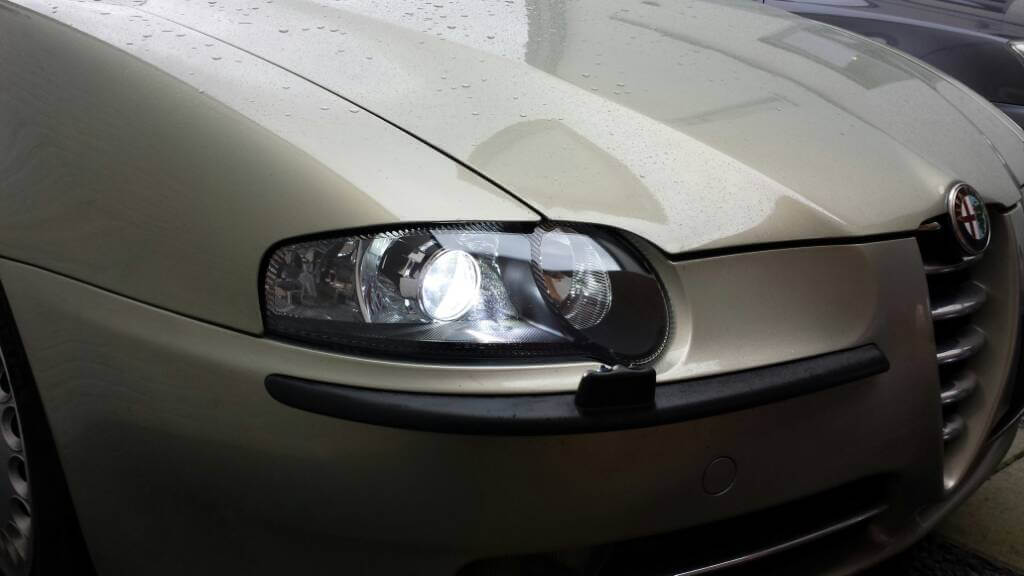
Installation tutorial for our popular Mini H1 Bi-xenon projector twin kit done on the Alfa Romeo 147 headlight. We show how to bake and open the headlight and mount the xenon projectors. At the end of the video we compare the halogen light output to plug & play xenon and Bi-xenon retrofit projectors Mini H1. Italian: Guida di installazione per il nostro popolare Mini H1 bi-xeno kit proiettore gemello fatto sulla Alfa Romeo 147 faro. Mostriamo come cuocere e aprire il faro e montare il proiettori allo xeno. Alla fine del video si confronta l'emissione di luce alogena per plug & play xeno e bi-xeno retrofit proiettori H1 Mini. 0:01 Bake the headlight. We use a big carton box with a heatgun. We put the headlight on small boxes so the hot air will be blown under the headlight, not only on one side. 0:09 In this case we use a 500W heatgun for 15 minutes. 0:14 Start to pry the headlight. In this case it is perma-sealed, so the seal doesn't really get soft, you will need to cut the sealing with the screw driver. 0:37 After working a couple of minutes the headlight housing cools down, heat it up again for a few minutes. 0:40 Work with patience and not too much force. This headlight took us 20 to 30 minutes to open properly. 1:04 Cut the remaining permaseal off the headlight lens using a sharp knife. 1:10 Scrape the remainign permaseal out of the headlight channel using a flathead screw driver. 1:18 Remove the bulb glare cap. 1:34 To mount the Bi-xenon projector, break the glare cap holder away. 2:05 Remove the bulb clip holder from the projector. 2:10 Mount the Mini Gatling Gun shroud with the 4 supplied screws. 2:19 Remove the black plug from the solenoid wires. 2:21 Insert the wires through the glare cap opening. 2:24 Place the rubber ring on the Mini H1 projector shaft. In this case the thin ring is used to give more thread length for the nut. 2:28 Place the projector in the reflector. 2:32 Place the H7 adapter ring. 2:42 Place the nut to secure the projector. 2:53 Secure the nut using needle nose pliers. 3:00 Place back the solenoid plug on the wires. 3:17 In this case we needed to bend the bulb clip holder a bit to fit properly 3:34 Mount the bulb clip holder with the 3 screws 3:42 Put the Butyl in the headlight channel for a proper seal 4:00 Press it down with your fingers 4:10 Clean fingerprints and dust off 4:28 In this case, customer wanted the headlight insert black 4:30 Press the lens on the housing. 4:33 Heat the headlight again for the sealant to become soft. 4:38 Press the lens back on the housing. 4:46 Gently squeeze the lens on the housing, make sure all the lens clips click back on. 5:05 Insert the H1 HID bulb in the projector. 5:12 Place the clip to secure the bulb. 5:28 Place the H7 high beam splitter to connect the solenoid for high beam functionallity. 5:40 Headlight retrofitted! 5:43 Original H7 halogen beam 5:53 H7 reflector plug & play 5000K 6:04 Mini H1 Bi-xenon projector retrofit
Mini H1 bi-xenon twin kit - Speedstart ballasts AMP Canbus - Mini Gatlin Gun shrouds - XB35 4300K or 5500K bulbs - T10 position lights to match the xenon color - H7 high beam splitters to connect the bi-xenon function