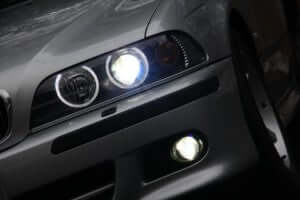
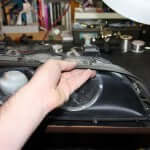
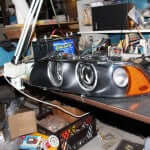
This guide is for your entertainment only and its author is not responsible for any damage done to your headlights, vehicle, or self.
This procedure is applicable to all Hella e39 headlights manufactured for the 2001 and early 2002 model years. Sometime during the late 2002 model year, Hella switched the type of adhesive found between the lens and the back half of the headlight, making it nearly impossible to open these newer-model headlights. If you’re lucky enough to have openable lights or can find a set, you’re able to modify the internals of the light to significantly improve your light output.
Parts required for this retrofit:
– Aharon EvoX-R Bi-xenon Projectors
– Ballast of your choice
– D2S bulb of your choice
– New headlight adjusters
– High-beam splitter cables (9005-9005/9006)
– 90mm rubber weather-proofing boots
– (Optional) New lenses for your lights
– (Optional) Extra butyl tape to seal your lights
Tools required for this retrofit:
– 7, 8, 10mm sockets
– Ratchet and extension
– T10, T15 screw drivers
– Assortment of flat head screw drivers
– X-Acto knife (or equivalent)
– Heat- resistant, non-bulky gloves
– Hair dryer or hot air gun
Removing your lights from the vehicle
There are four 8mm bolts that secure the headlight to the vehicle. Two of these bolts are easily visible on the top of the light, and two are a bit harder to see farther down behind the headlight. Note that the two lower bolts have a larger thread diameter and should not accidentally be installed in the upper locations.
Remove all four bolts and unplug all electrical connections on the back of the light (high, low, angel eye, turn signal, and xenon auto-level motor if applicable). Gently remove the headlight from the vehicle by pulling the end closest to the center of the car towards you. This allows the under-headlight trim piece to come free from the fender just below the turn signal. Once this hook is free, the light can be removed from the vehicle.
Preparing the light for opening
Remove the car-colored plastic strip under the headlights. It clips in on one side, where a flat head screwdriver is required to release the clip. The rest of the strip will simply pull off.
Remove all bulbs and rubber boots from the light. All bulbs will twist free, and the boots will pull right off. I’ve found that the boots are sometimes a bit stubborn and need to be broken free from the assemblies with a flat-head screwdriver around their circumference. Remove the plastic ring where the high beam bulb mounts.
Remove two T10 screws near the turn-signal side of the assembly, around the back.
Remove the rubber seal at the top of the headlight.
Thoroughly clean the light fixture before baking the light. Check to make sure your light isn’t the ‘sealed shut’ type. Use needle nose pliers to grab a bit of adhesive out of the crack between the lens and body. If it has the consistency of Butyl tape, you’re good. If it feels more like dried RTV sealant, your light cannot be opened.
Opening the light
Preheat oven to around 200 degrees. Place the light in the oven for 7-10 minutes. Wearing heat-resistant gloves, remove the light from the oven and run to your work area. Start at the end of the light towards the center of the car (away from the turn signal). With your left hand, gently raise the clip of the lens up. At the same time, insert a flat-head screwdriver in the crack between the lens and headlight body and twist it. This will begin to separate the two halves of the headlight. Working your way around the perimeter, separate the halves of the light. Feel free to either put the light back in the oven for a minute or two or use a blow dryer to re-soften parts of the adhesive if it gets too cold. Use an X-Acto or safety razor to cut the adhesive strands if necessary.
With some patience and luck, your light will easily open. If you’re having a hard time separating the two hales, it’s possible that your light has the wrong kind of sealant and cannot be opened.
Disassembling the light
Once the lens is off, use the blow dryer to heat up the areas by the tabs that hold the black plastic shroud in place. The tabs are easy to see if you inspect the light. By heating the area around each tab, you’re softening the butyl material and making them much easier to remove.
As you remove the black plastic shroud, the angel eyes should come along with it. The angel eye rings separate from the light pipes (fiber optic pipes) behind them, and are held in place by a separate piece that clips into the black plastic shroud. Remove this whole unit and place it somewhere safe.
Now, you’ll see the functional bits of the headlight. This consists of the main light frame that includes the high beam reflector and the low-beam projector. This frame is made out of metal and mounts to the headlight at three points – the horizontal adjuster, the vertical adjuster, and the peg at the bottom (note – if your light has auto-leveling, the peg is replaced by the auto-level motor. Only halogen lights have this ‘dummy peg’ that just stays in place. Note – DO NOT try to remove the dummy peg from the back of the headlight. Doing so will certainly break it, and it’s a pain in the butt to rig up a way to hold it in place. Leave it be!
We now must remove the light frame from the back half of the headlight assembly. To do so, all three connections must be removed.
FOR AUTO-LEVELING: You’ve already removed the motor, so your light frame is only held in two places. Unscrew the plasic adjusters from their threaded shafts to remove the light frame. (this may already be done if you adjusters are broken!!!
FOR ‘DUMMY PEG’ lights: This is a bit trickier than on auto-leveling lights. Carefully inspect how the peg’s ball slides into the socket on the light frame. Using a screw driver to keep force off the brittle plastic, slide the light frame enough to allow the ball to slide out of the socket. Now, proceed to unscrew the adjusters from their threaded rods as for the auto-leveling lights. Your light frame should come free of the headlight assembly.
Chances are good that there are broken off pieces of adjuster ends in the sockets on the light frame. These can be a bit tricky to remove, but it’s certainly possible. Using a combination of needle-nose pliers and a small flathead screwdriver, remove the adjuster bits from the sockets so your light frame is ready for fresh adjusters. Now is a good time to remove any broken adjuster bits from the headlight body, install the new ones, and cycle them a few times to allow them to move freely.
Remove the OEM projector from the light frame. Be careful to only place the light frame down on a soft cloth, as it’s easy to scratch its chrome finish or the lens of the projector. The projector is attached via (3) or (4) 7mm nuts, which simply need to be removed with a deep socket. Note – because of the adjacent projector bowl, it may be impossible to get the socket on the nut at first. Use pliers to loosen the nut until the socket can grab it.
Once the old projector is out, you’ve completed the disassembly of your lights and are now ready to install the shiny new parts!
Assembling your headlights
In place of the old projectors, install the EVOX-Rs. Don’t over-tighten the nuts holding them in place, simply tighten them enough to hold the projector in place.
Now comes the most important part of the install: aiming the projector relative to the high beam reflector. Once you install the light frame in the headlight, this is impossible to do. It’s super important to get it right now!
Rig up a way to power both the high and low beam at the same time. I used a car battery and some jumper cables to do this. Go somewhere dark where you can see the beam produced by the lights (I used my back yard, with the lights shining on the trees 100+ feet out). Tighten / loosen the correct nuts on the projector to align it correctly with the high beam. For those who don’t know, you want the high beam centered over the step in the cutoff, with the majority of the light coming in just above the cutoff. Too low and you’ll illuminate the road close to your car more than the distance. Too high and you’ll just be lighting up the trees.
Once you’re happy with the relative alignment, thoroughly clean the light frame with a microfiber cloth. Make sure there are no fingerprints on the projector lens, high beam reflector, etc. Taking a few extra minutes here will surely save you from the frustration of having a fingerprint inside your beautiful new lights.
Now we will put the light frame back into the headlight assembly. If your lights have the ‘dummy peg’, this is the first one to attach by carefully re-inserting the ball into its socket (if not, you’ll install this when you put the auto-level motor back in). Next, snap the adjuster sockets onto the ends of the adjusters. Your light frame is now re-installed, and you can use a 10mm socket to exercise the adjusters in/out to see how it moves the light frame.
Next, the black plastic shroud and Angel eyes can be re-installed. Simply use the blow dryer to reheat the adhesive and shove the tabs back into their places. Make sure the angel eye light tubes align with the angel eye rings.
Thoroughly clean the inside of your outer lens before putting it back on your light. If you don’t think there’s enough sealant left in the crack where the lens installs, purchase some from TRS so your lights seal well.
Place the lens over the front of the light and go back up to the oven (make sure your bulbs are removed first). Bake the light again for a few minutes to soften the adhesive. Once it’s soft, simply squeeze the two halves of the light together to seal the unit. This may take a solid amount of force. Install the two screws that hold the lens to the light body.
Now, you can replace your bulbs, install the sealing boots around the openings (I used a 90mm boot from TRS to seal the back of the projector area, as my old boots wouldn’t work), and install the lights in the car. Wire everything in place, using high beam splitters to power the solenoid.
Make sure you properly aim your lights before driving at night. Guides on proper headlight aim can be found on the internet.
I installed paint protection film on my new lenses to protect them from road rash. If you replaced your lenses, PPF can be a good investment to keep them safe.
Thanks for reading!
Source: cwise12 on bimmerforums


